
If there is one piece of gear every climber should know about it’s the Petzl GriGri belay device. Launched in 1991, the Petzl GriGri is the undisputed leader when it comes to assisted braking systems on the market and is the most popular belay device when it comes to sport climbing.
The name GriGri came from Michael Suhubiette, an employee at Petzl who referred to it as a gri-gri after an African voodoo amulet that’s meant to keep you away from harm.
How Does a GriGri Work?
Before the GriGri came out on the market, most of the belaying was done with the good-ol’ figure-eight devices, ATC’s or stitch plates, which of course laid the path for modern belaying devices. However, there was still a lot of room for human error.
The mechanism inside a GriGri is pretty simple and logical, having its roots not in climbing but in the car industry, particularly in the seat belt system. In other words, the GriGri is designed to act like a seat belt, where if you move it slowly, it slides out, but if you pull it hard, it locks.
The locking of the rope into the device is due to a cam piece that moves its position. Whenever the friction shifts, the cam “strangles” the rope, freezing everything. Of course, on the GriGri, tension can be released by the lever, different from the seat belt, which comes back to its initial state when tension is released.
The innovation Petzl brought with the GriGri added an extra layer of protection in catching climbers. Climbers and gyms quickly adopted it as the go-to piece of gear when it comes to belaying.
We all know that when it comes to belaying, climbers will use the device that they feel most comfortable with. We can all agree that the era of the figure-eight has come to an end, and only a handful of climbers still use ATCs, but what about the others?
After the release of the GriGri, a lot of other brands started developing their own systems pretty similar to this one, and climbers got more and more familiar with the assisted belay devices, with the Petzl GriGri being among the most popular.
How To Use a GriGri Belay Device
When talking about assisted belay devices, we should first keep in mind that it’s not an auto-locking device, and you’ll still need to dedicate 100% of your attention to the lead climber while holding your hand on the brake end of the rope.
Although belaying with a GriGri is considered safe, accidents do happen, and these are mostly because of human factors such as a distracted belayer or loading the device the wrong way.
1) Preparation
- Ensure you have the correct version of the Petzl GriGri for your rope size. There is a diagram on the back of the GriGri that tells you. For example, the GriGri + takes an 8.5 to 11mm rope and the GriGri 2nd Gen takes 8.9 to 11mm.
- Inspect the GriGri for any damage or wear.
2) Threading The Rope
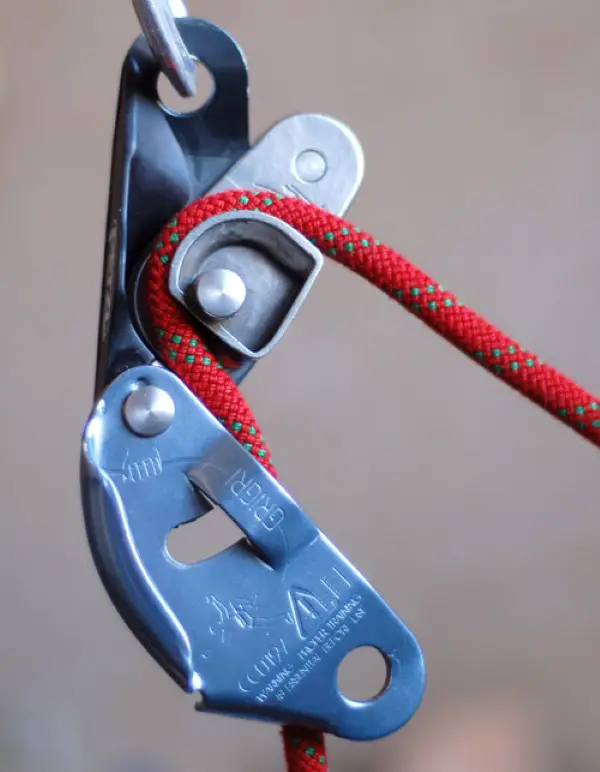
- Face the GriGri with the lever on the left and the plate on the right.
- Lift up the plate and follow the rope diagram on the side of the GriGri to thread the rope correctly.
- Ensure the rope is running from the climber, through the GriGri, and then to the belayer.
- Close the side plate securely.
3) Attaching the GriGri to the Belay Loop
- Attach the GriGri to your harness’s belay loop using a locking carabiner.
- Make sure the carabiner is locked and the GriGri’s orientation is correct (lever on the left, plate on the right).
How To Belay With a GriGri
Lead belaying with a GriGri is very similar to any other device, although it has some particularities. Be sure to take your time, and always perform a buddy check before climbing or belaying.
1) Feeding Rope to the Climber (While Climbing)
- Positioning Your Hands: Keep your brake hand (the right hand) on the brake end of the rope at all times. Your other hand will be used to feed rope to the climber.
- Feeding Rope: To give slack when the climber is moving and clipping, slide your brake hand down and grab a loop of rope. With your non-brake hand pull the rope up through the GriGri
- Maintaining Control: Always return your brake hand to the brake position immediately after feeding the rope.
Feeding Out Rope Fast: If you need to feed out rope to the climber fast, without letting go of the rope move your brake hand up to the GriGri, place your index finger under the lip to keep the GriGri steady and press down on the cam with your thumb. Keep at least three fingers on the brake rope. You’ll be able to feed out rope with your left hand much faster. Return to proper belaying and hand placements after that.
2) Taking in Slack
- Pulling Rope Through: Use your non-brake hand to pull the excess rope through the GriGri and slide your brake hand up and down to take that excess rope.
- Brake Hand Position: Keep your brake hand in the braking position on the rope at all times.
- Smooth Movements: Ensure smooth and controlled movements to avoid accidentally engaging the cam, which would stop the rope from moving freely.
3) Catching A Fall
- Be Alert: Always be ready to catch a fall. Keep an eye on the climber and be prepared to react.
- Brake Hand: Your brake hand should already be in the braking position. In the event of a fall, the GriGri’s cam will automatically engage to stop the rope, assisted by the braking action of your hand.
- Absorbing the Fall: Stand in a position that allows you to absorb the force of the fall, potentially stepping forward, sitting down slightly or jumping up to soften the catch.
4) Lowering The Climber
- Communication: Ensure you and the climber communicate clearly about when to start lowering.
- Lowering Position: Keeping your brake hand firmly on the brake end of the rope, bring the rope above the GriGri like in the image below. This allows the rope to go through the GriGri smoothly while you lower.
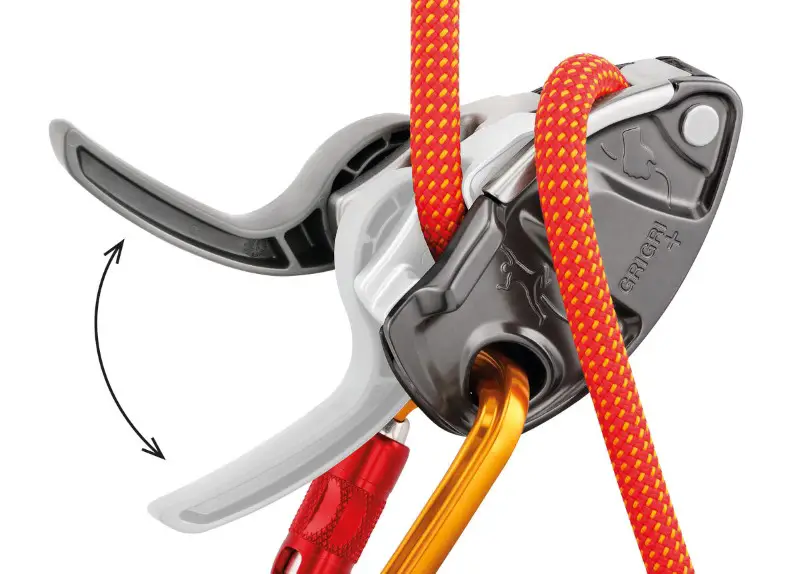
- Using the Lever: Use your non-brake hand to slowly and carefully pull the lever of the GriGri towards you. This action controls the speed at which the rope is released.
- Controlled Lowering: Pull the lever gradually. The more you pull the handle, the faster the rope will feed. Always be ready to close the handle to stop or slow down the descent.
Brake Hand: Keep your brake hand in the braking position at all times. If you need to stop quickly, release the handle and tighten your grip with your brake hand.
5) General Safety Tips
- Never Let Go of the Brake Rope: This is the most crucial aspect of belaying with any device.
- Regular Checks: Regularly check that the rope is correctly threaded in the GriGri and that the carabiner is locked.
- Stay Attentive: Always keep an eye on the climber and be prepared for any situation.
How To Belay With a GriGri From Above
The Petzl GriGri isn’t one of the most popular devices for nothing. Due to its light construction, it is very often the go-to device when it comes to belaying from above on a multi-pitch route.
Belaying from a belay station is pretty easy with the GriGri, and the technique is almost similar to belaying a top rope climber, except they are coming from below you.
1) Setting Up At The Belay Station
- Secure yourself at the belay station with your personal anchor system (PAS).
- Build a top rope anchor using a sling (preferably a quad anchor), and secure yourself with a clove hitch if needed.
- Pull the rope up, making sure it is neat, either on a ledge or around your feet.
- Attach the GriGri to the anchor you’ve built.
- This time, you want the GriGri to sit upside down, with the Petzl logo above, the lever facing down on the left and the plate on the right.
The reason you want the GriGri to face downwards is because your climber is coming from below you. If you attach your GriGri like you normally would on your harness loop, it’ll make belaying a lot harder. And just like a normal belay, never take your hand off the brake side of the rope.
Always make sure you are not overloading the anchors and always have backups in case something fails. You know that they almost never do, but in rock climbing, everything is overengineered for a good reason, and that’s because your and your partner’s lives depend on them.
Rappel With A GriGri
Although ATC’s are favored for rappelling due to their ease, you can also rappel with a GriGri. Here’s how it’s done.
- Bring up some rope from one side and tie an overhand knot. Attach this to your harness with a locking carabiner. This will prevent from you accidentally dropping the rope as you need to untie your figure eight knot. Make sure you are also tied into a PAS.
- Once you’ve untied your figure eight, start pulling the rope through until you get to the halfway mark or until you can see both ends of the rope are touching the bottom.
- If you are multi-pitching, make sure you have tied stopper knots at each end of the rope.
- Tie in a clove hitch on one side and secure that with a locking carabiner.
- Pull on the other side of the rope and you’ll see that the locking carabiner is preventing the rope from just wizzing through.
- Attach your GriGri on the other side, NOT the side with the carabiner.
- Rappel safely to the ground by feeding the rope with the brake hand and pulling the lever with your right hand.
Common Mistakes When Using The Petzl GRIGRI
The GRIGRI is not a foolproof device, and it’s prone to human error and gear failure. These errors might occur sometimes due to lack of attention, exhaustion, or lack of knowledge/training. All of the following mistakes can easily be corrected with a little training at your local crag or gym.
1) Using Wrong Size Rope
If the rope is slimmer than the minimal supported diameter, it might slip through the device and not engage. On the other side, if the rope is thicker, it won’t slide through the cam, making climbing very difficult.
2) Incorrect Loading of the Rope
One of the most common mistakes is threading the rope through the GriGri incorrectly. Always follow the diagram on the device to ensure the rope is loaded correctly.
3) Not Keeping a Hand on the Brake Strand
Even though the GriGri has an assisted braking feature, it is crucial to always keep a hand on the brake strand of the rope. Failure to do so can prevent the device from functioning correctly in the event of a fall.
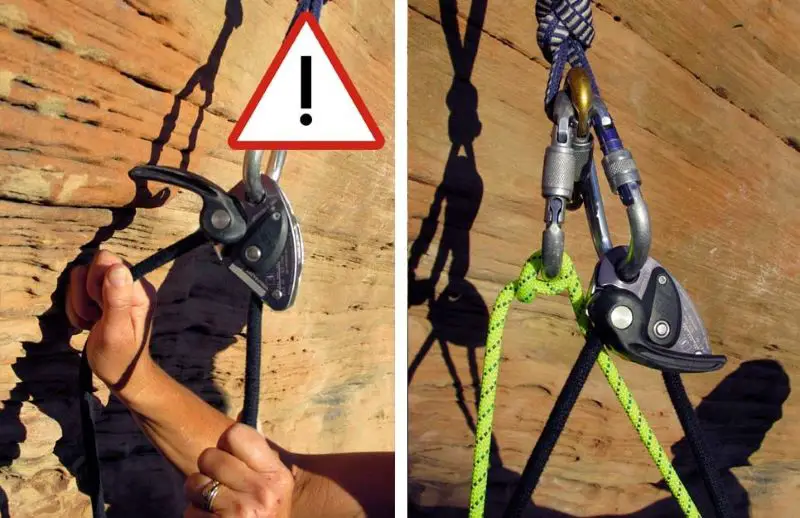
4) Overriding the Camming Mechanism
Gripping the GriGri too tightly or in the wrong place during a fall can prevent the camming mechanism from engaging. This mistake can lead to a failure to arrest a fall.
5) Improper Use of the Handle While Lowering
Some belayers pull the handle too far or too quickly when lowering a climber, leading to an uncontrolled descent. It’s important to use the handle gently and in conjunction with the brake hand to control the descent speed.
6) Panic Pulling
In a stressful situation, such as when a climber falls, belayers sometimes instinctively pull hard on the brake strand. This reaction can inadvertently keep the cam from engaging, especially if the belayer’s hand is too close to the device.
7) Incorrect Hand Positioning While Feeding Slack
When feeding slack quickly, some belayers might improperly position their hands, let go of the brake rope or use unsafe methods to override the camming action, which can compromise safety.
8) Not Paying Attention
Complacency or distraction while belaying with a GriGri is dangerous. Always stay attentive to the climber’s needs and the rope’s movement.
9) Failure to Perform Regular Inspections
Not inspecting the GriGri for wear and tear can lead to malfunctions. Regularly check for signs of damage or excessive wear.
10) Relying Solely on the Device
Over-reliance on the GriGri’s assisted braking feature can lead to poor belaying habits. Remember, the GriGri is an aid, not a substitute for proper belaying technique.
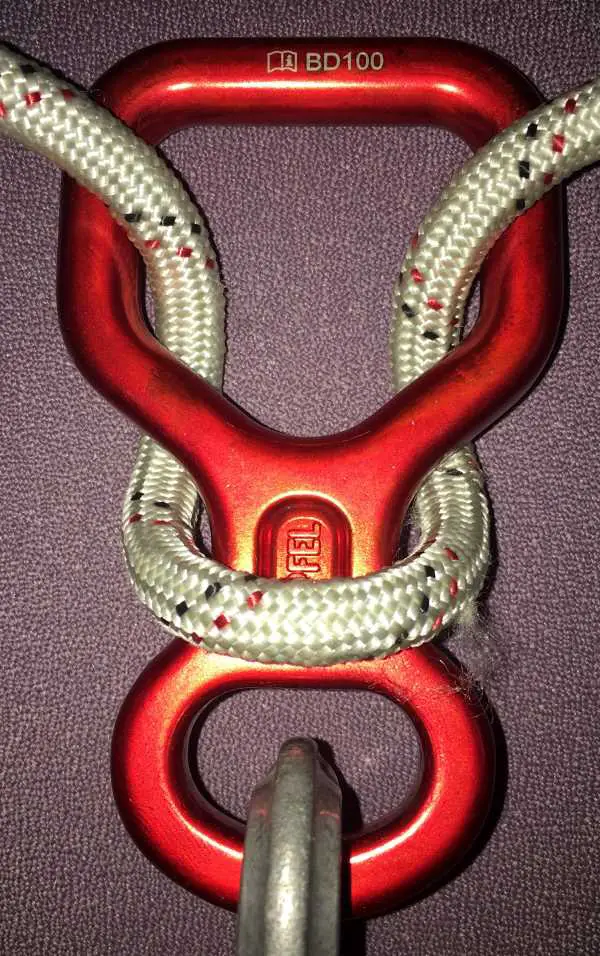
11) Forgetting To Lock The Carabiner
The downside of forgetting to lock a screwgate carabiner is that it won’t have the same mechanical resistance as it would have when locked. Of course, there is also the potential of some freak accident if the gate opens. To prevent this from happening, always get your buddy to check and get yourself an auto-lock carabiner. I like to occasionally throughout the climb check the gate is still shut and has not moved.
12) Getting Your Hair Stuck
For all the long haired gals and guys out there, please for the sake of your beautiful locks, tie your hair up and away from the GriGri.
13) Getting Your Finger Stuck Into The Cam
Be sure to keep your breaking hand at a reasonable distance from the belay device.
What Do You Think Of The Gri Gri?
The Petzl GRIGRI is for sure one of the most effective and revolutionary belay devices of our time. Safety is number one priority when rock climbing, and when we know we are in safe hands, we can focus fully on our climbing.
If you are new to using a GriGri, make sure you read the instructions, watch videos and practice as much as you can. Head to your local gym and experiment with falling, catching, belaying top rope, and leading. It’s important that you get to feel comfortable with your belay device in order to reduce the risks of making a mistake.
